For SmartSDR, DAX, and CAT:
Follow the steps 1 & 2 below.
For Maestro:
Please see Maestro section further down the page!
Updating SmartSDR on a PC
1️⃣ Uninstall any versions of SmartSDR from your PC that are older than v3.5.9, then reboot.
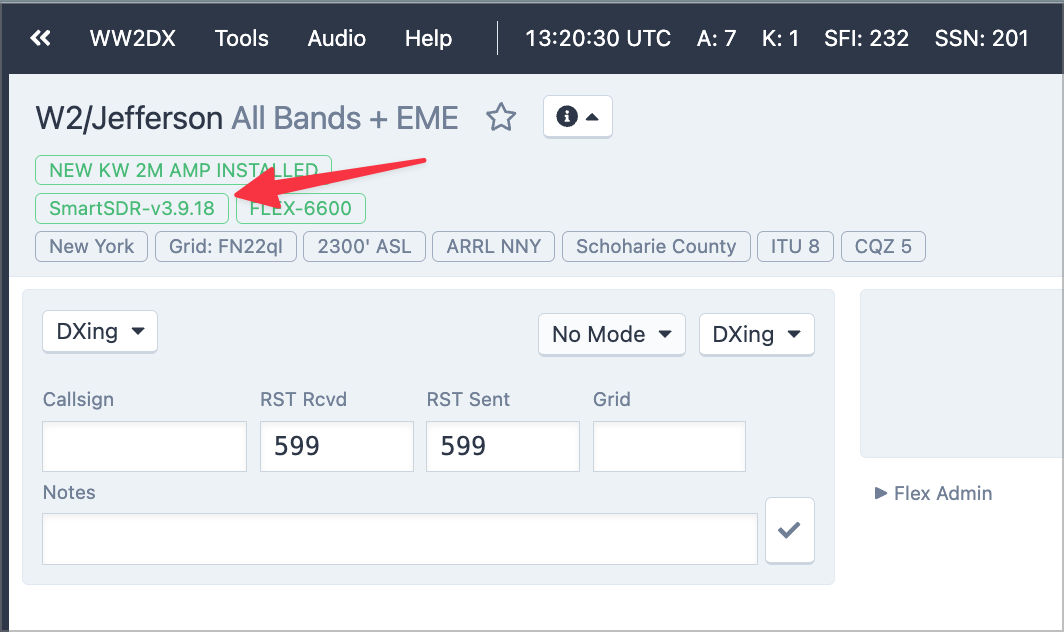
2️⃣ Download the current running version of SmartSDR from the Flex Website. You can see what the current running version of SmartSDR is running on RHR sites by looking at the "Station Info" header of any RHR station in the console.
This video shows the steps to install SmartSDR on your PC.
Updating FlexRadio Maestro
⚠️ Updating a Maestro from version X.X.X to X.X.X may take a long time, depending on which Maestro version you have.
The Model A Maestro (early generation, power button on the top of the case) will update in about twenty minutes.
The Model B Maestro (later generation, power button on the left side of the case) may take up to five hours to update.
The reason for this upgrade is that the Maestro runs an older version of the Windows tablet operating system. SmartSDR v3.2.39 requires a underlying Windows security update for the .NET Framework.
Before beginning the update
Connect to Maestro to a 12V power supply. DO NOT RELY ON THE OPTIONAL INTERNAL BATTERY.
Connect your Maestro to ethernet; WiFi is not recommended.
Once you start the upgrade process, it may seem that a long duration of time has passed with no progress being made. THIS IS EXPECTED! Patience is important here.
The Model A Maestro will reboot once, but the Model B Maestro will go through four rounds of installs and reboots.
Walkthrough
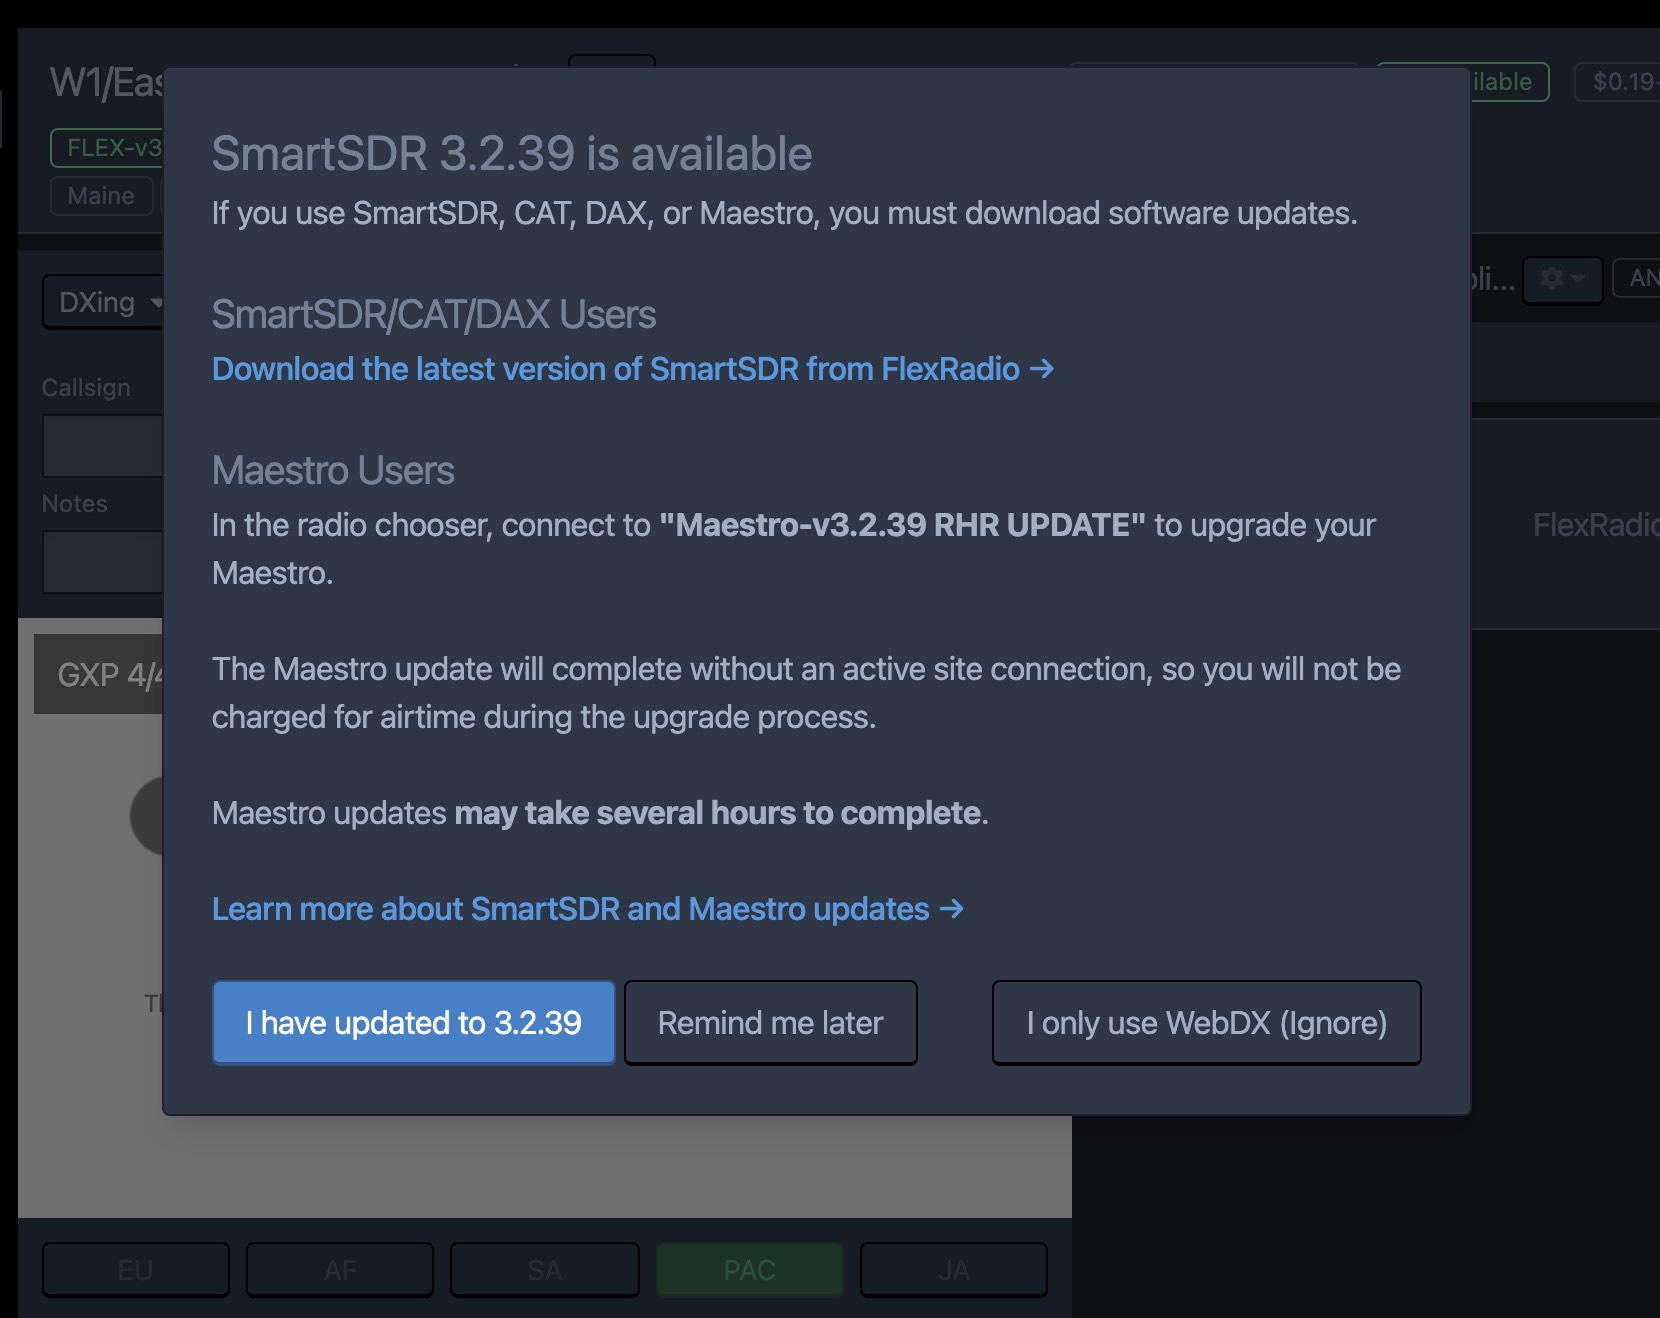
The very first step in the process is when you are asked to update the RHR Desktop App. When the app restarts you will be presented with a pop up message that looks like this.
With the Maestro running, connected to 12V and ethernet, you should see this in the "Select Radio" screen.
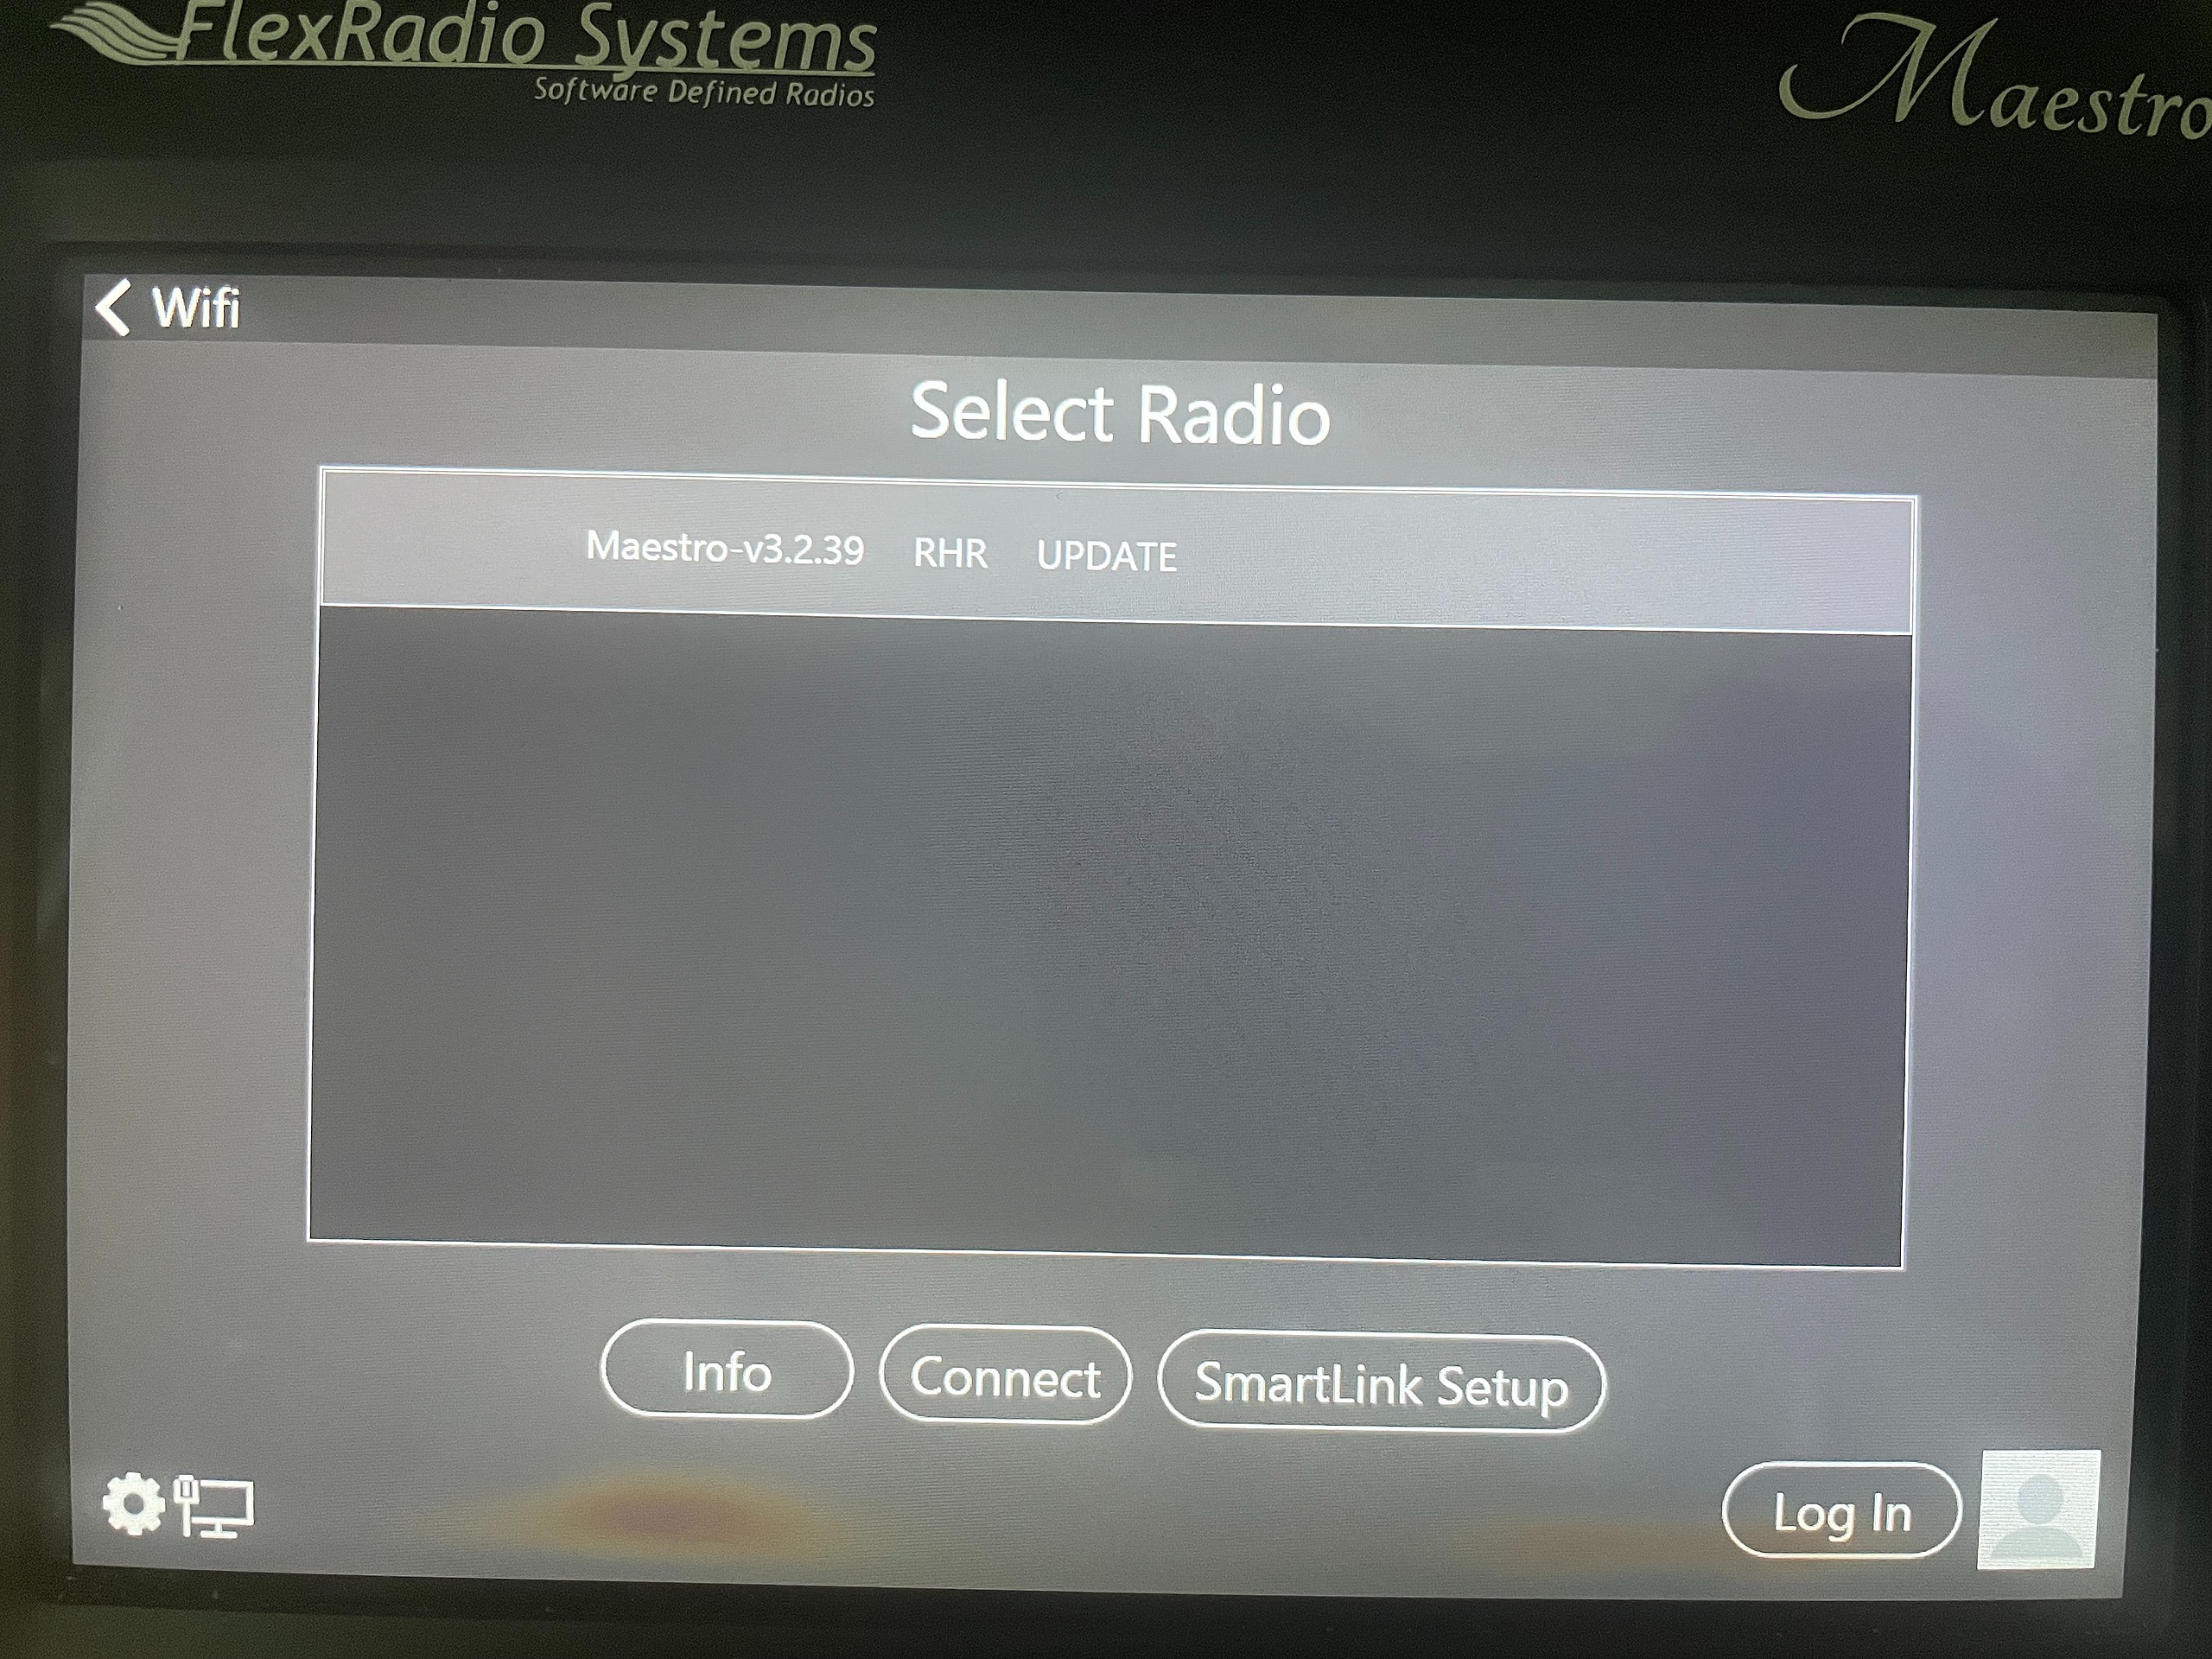
With the "RHR UPDATE" selected (you will have other radios in your list if you own a FlexRadio), press "Connect".
You will be presented with the "Select a Version" menu. Here you will select Updated*(v3.4.23 and press "Update".)
This is the start of the upgrade of your Maestro. This first pass will go through steps 1 through 4 and the screen will change to this.
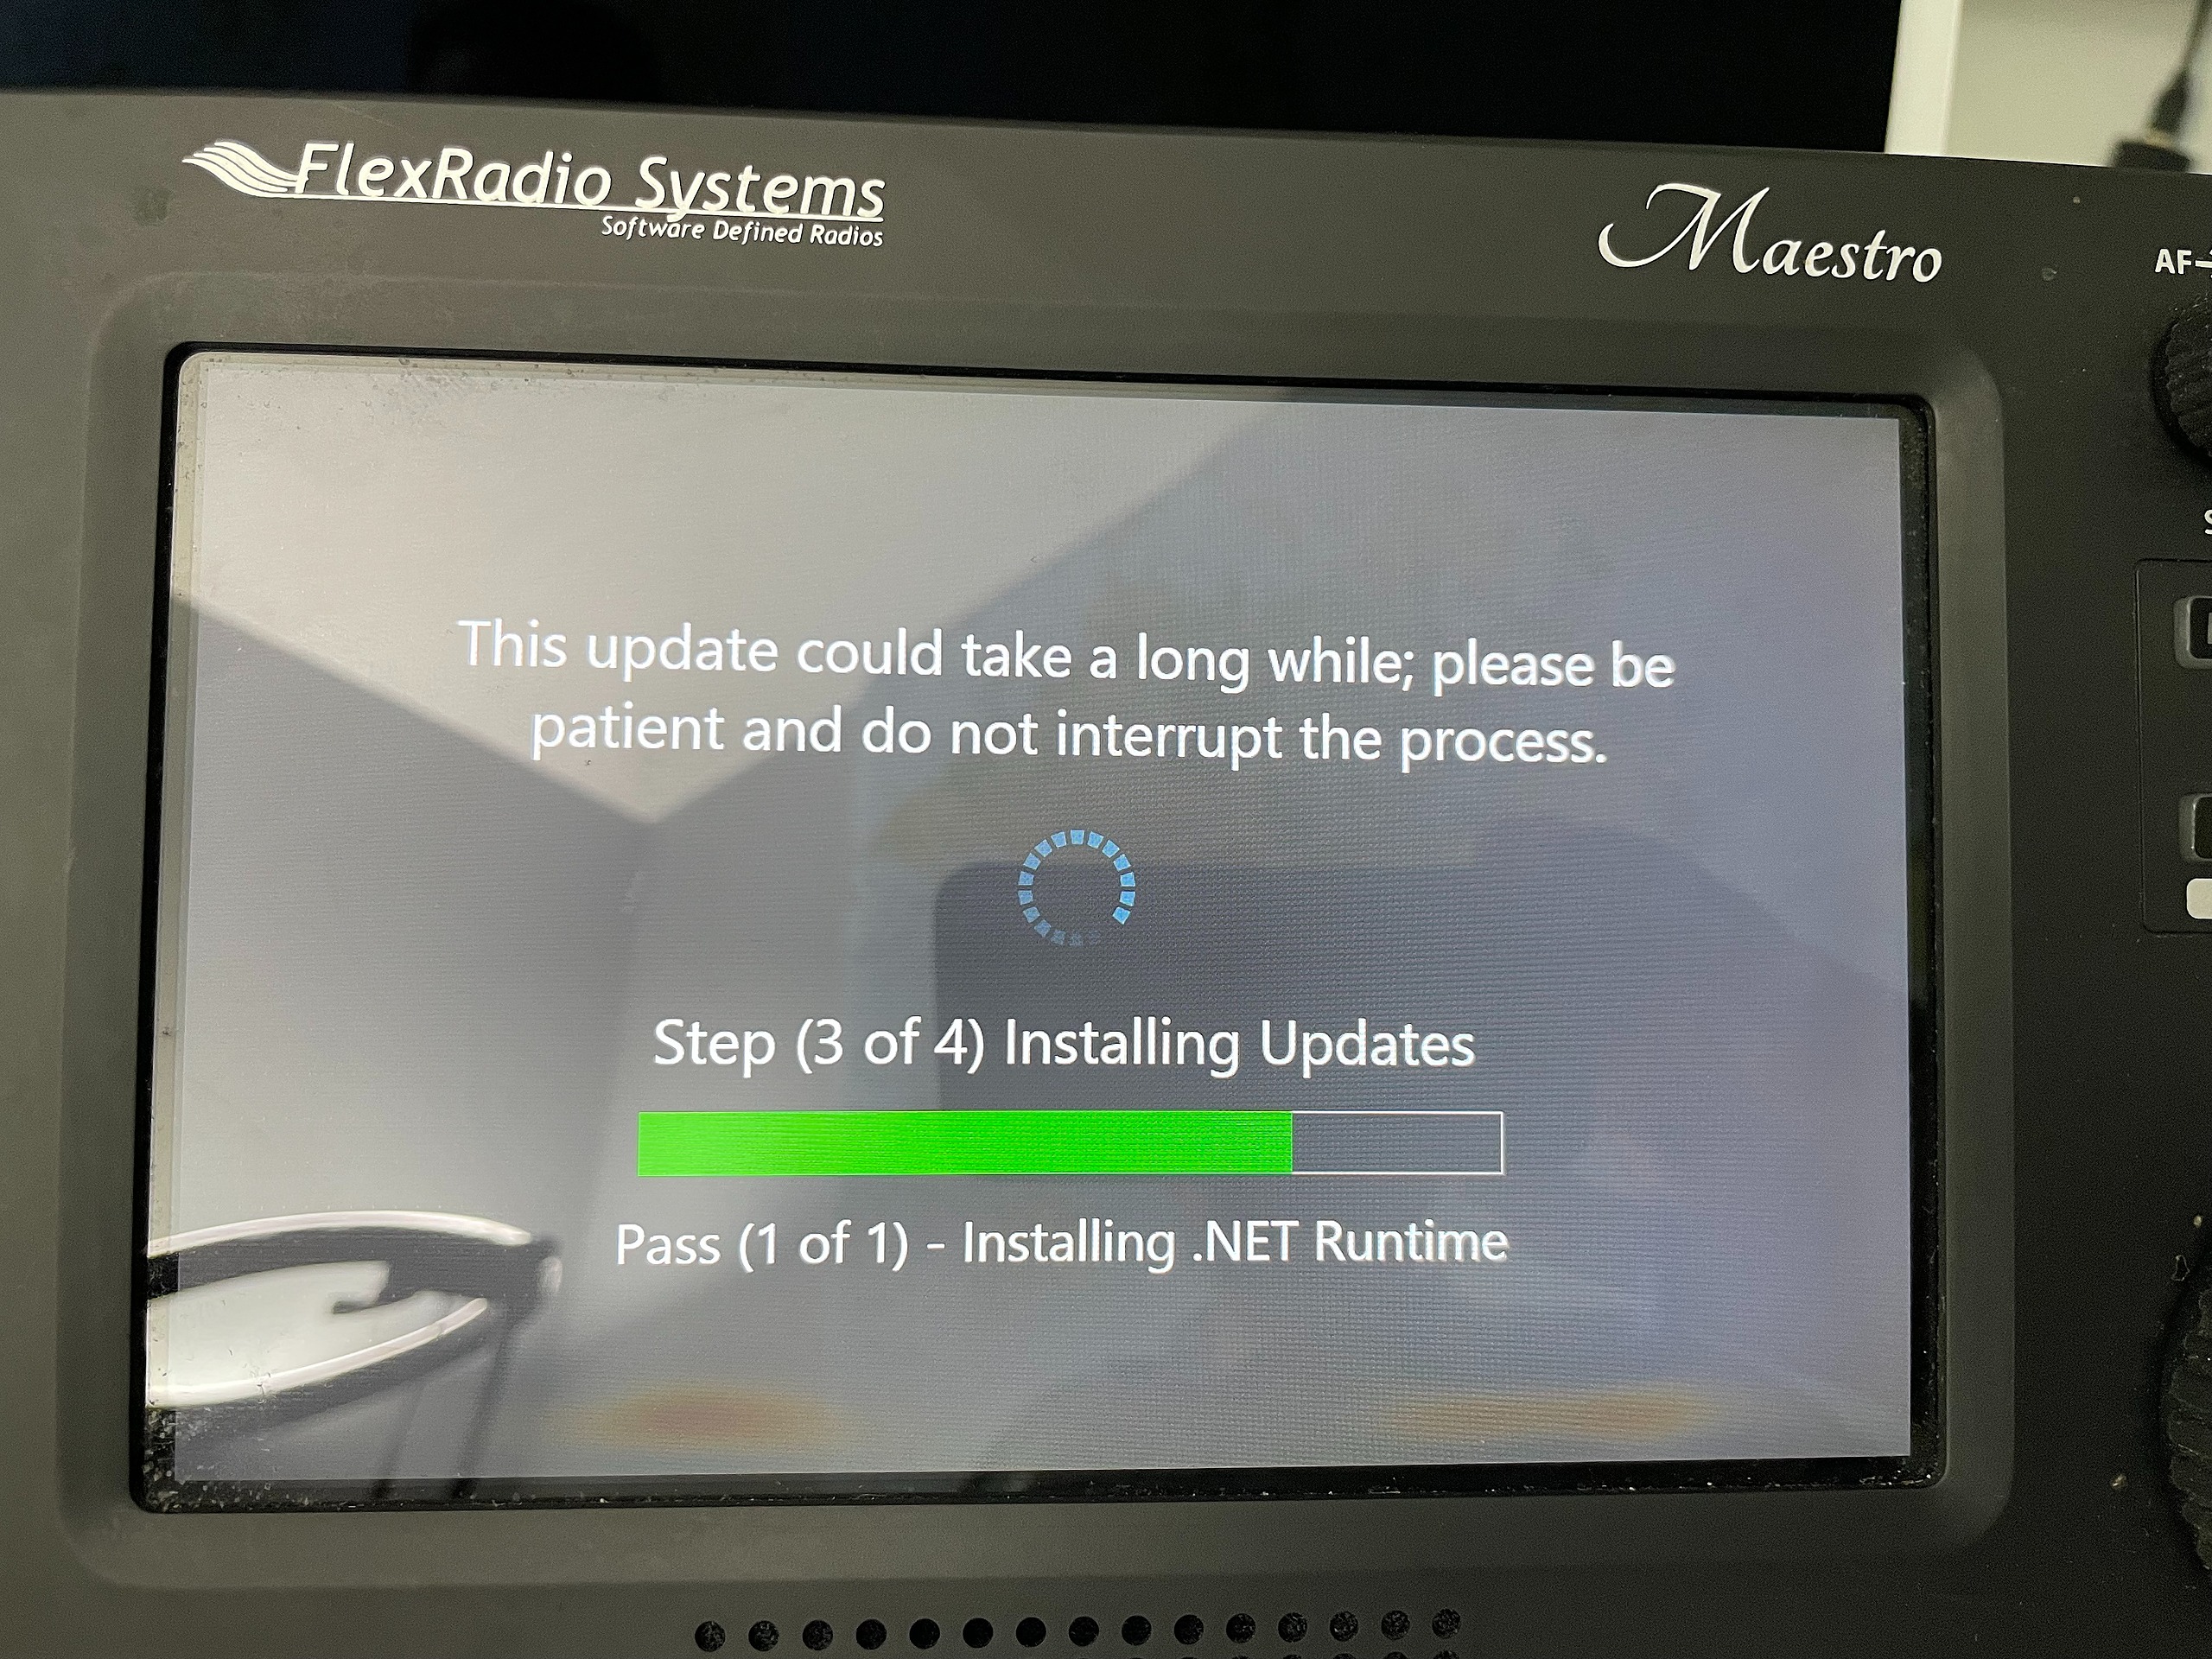
After about 8 minutes, you will see this screen:
Shortly after this, the Maestro will reboot. You will be presented with the familiar screen to "Select Radio" and we will complete the same steps as above. Select RHR UPDATE then "Connect".
Model A Maestro owners:
Your update is now complete.
Model B Maestro owners:
You will need to repeat the above steps a few more times to complete your upgrade.
After each reboot, you will be presented back to the normal "Select Radio" screen. Continue this process until the "update" is no longer required. At this point you can now use the Maestro at the RHR sites as normal.

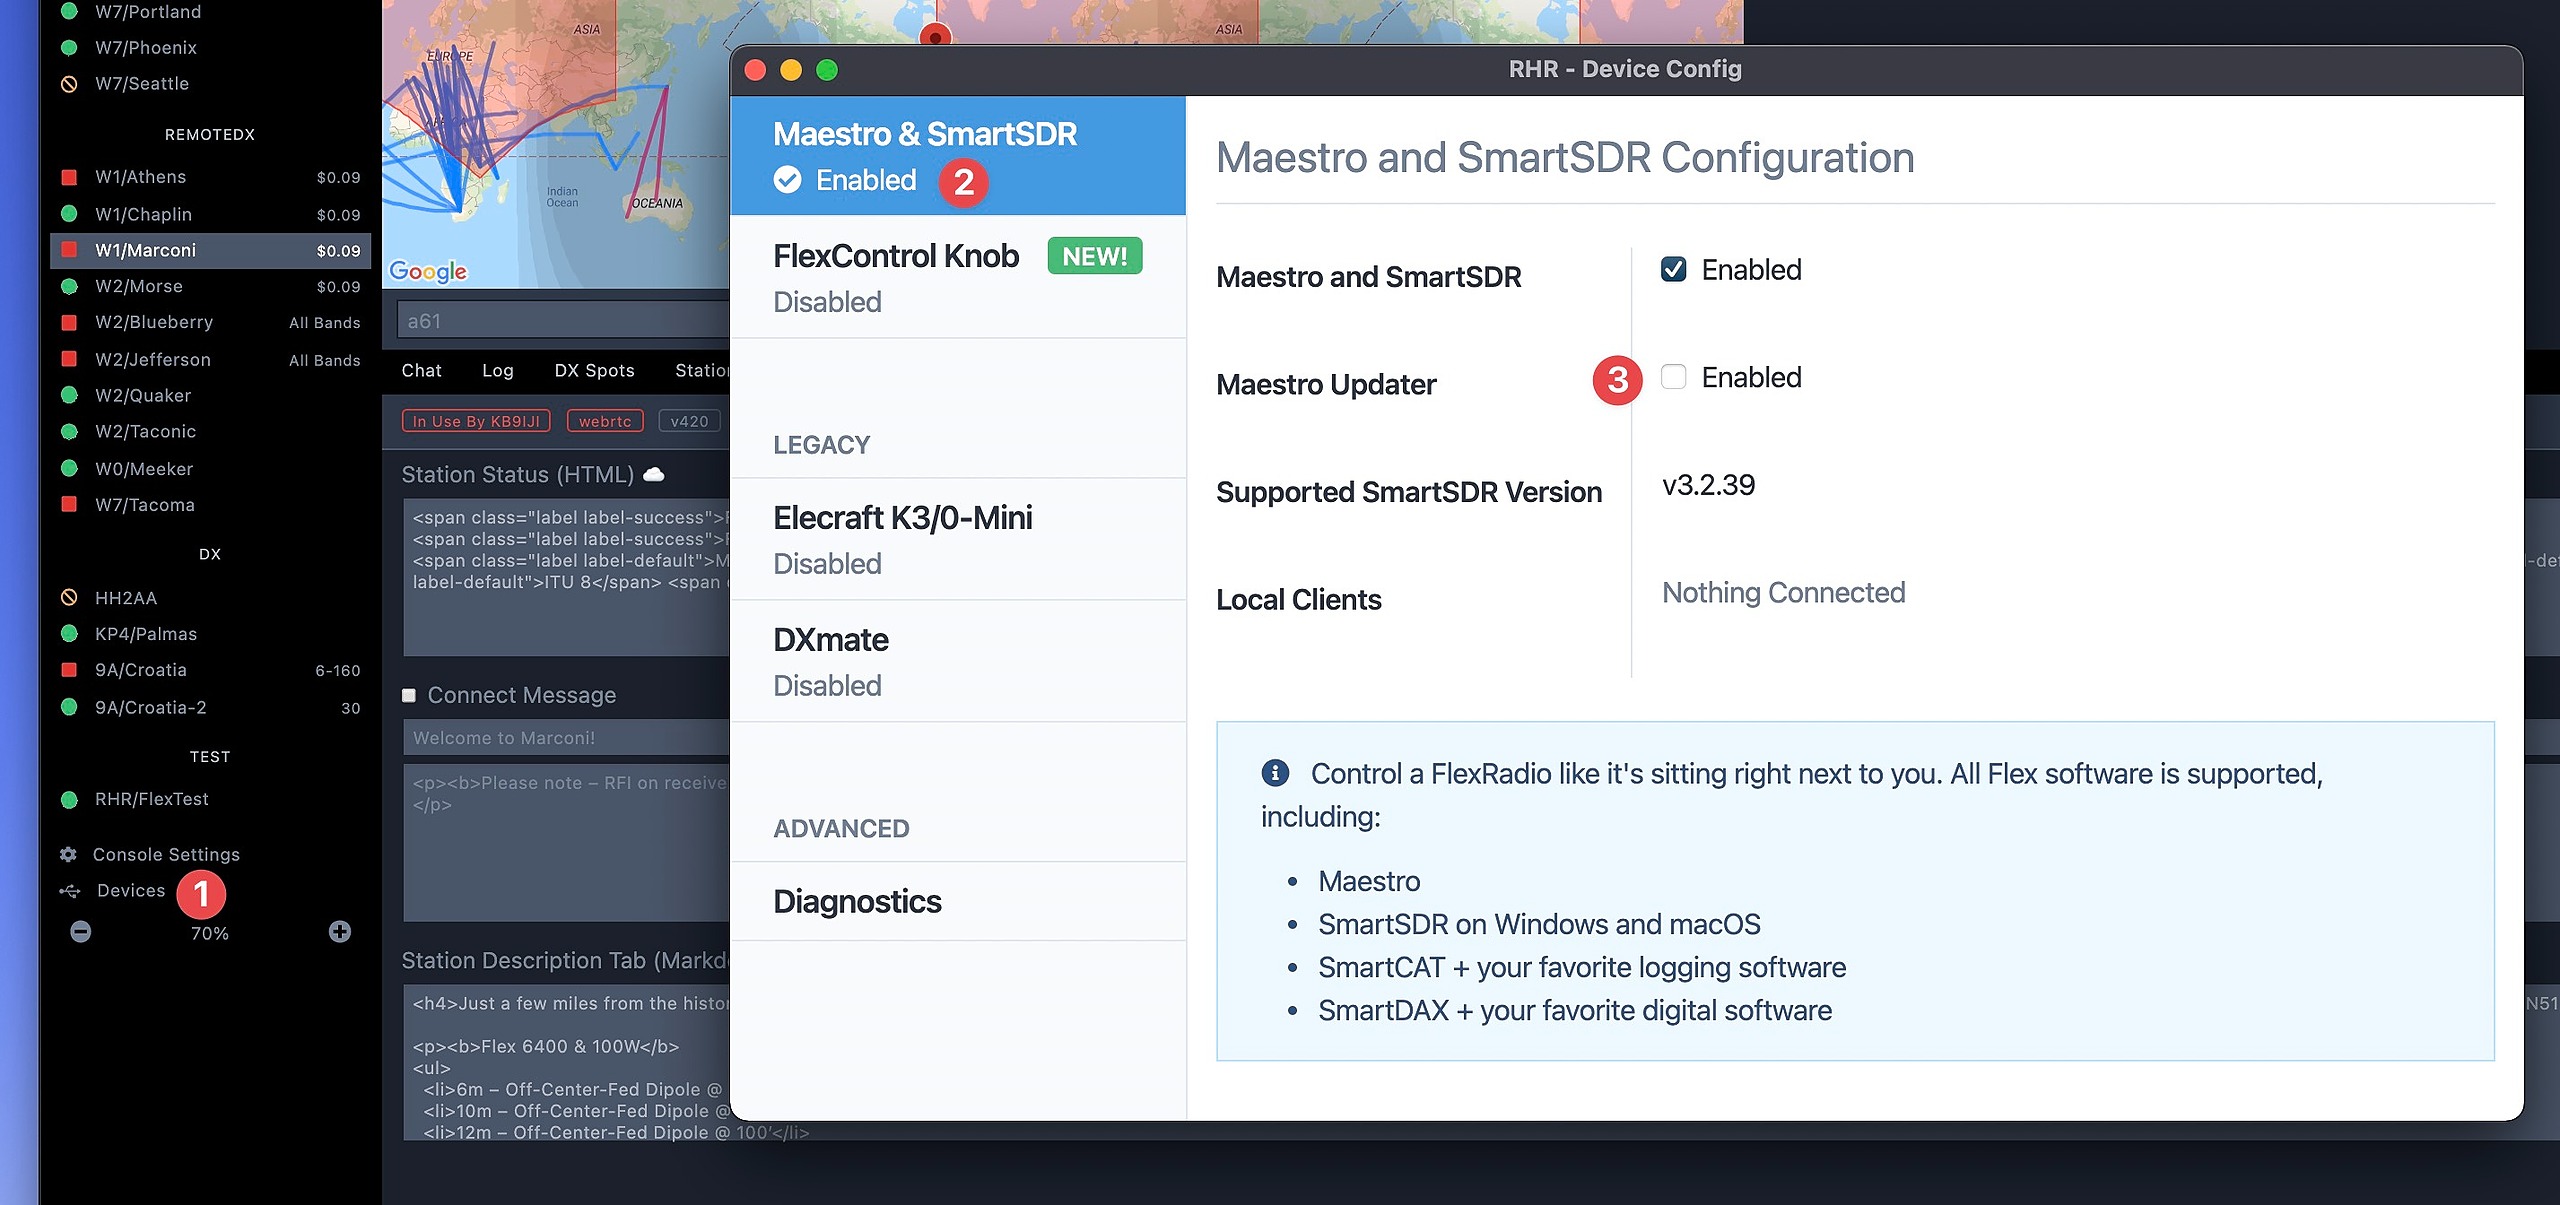
Once you have completed your update you can disable the "Maestro RHR UPDATE" Devices → Maestro & SmartSDR → uncheck the "Maestro Updater" checkbox.